Over-engineering Secret Santa with Python cryptography and Datasette
11th December 2022
We’re doing a family Secret Santa this year, and we needed a way to randomly assign people to each other without anyone knowing who was assigned to who.
I offered to write some software! (Maybe “insisted” is more accurate)
I’ve been wanting an excuse to write something fun involving Python’s cryptography library for years. The problem is that I’m too responsible/cowardly to ignore the many warnings to only use the “hazardous materials” area of that library if you know exactly what you’re doing.
A secret santa is the perfect low stakes project to ignore those warnings and play with something fun.
My requirements
I have six participants. Each participant needs to know who they are to buy a gift for—with no way of finding out any of the other gift pairings.
As the administrator of the system I must not be able to figure out the pairings either.
I don’t want to use email or logins or anything like that—I just want to be able to share a link in the family WhatsApp group and have everyone use the same interface to get their pairing.
How it works
Here’s the scheme I came up with:
- Each participant gets a password generated for them. This happens on demand when they click a button—with an honour system not to click someone else’s button (easily detected since each button can only be clicked once). If someone DOES click someone else’s button we can reset the entire system and start again.
- Their password is generated for them—it’s three random words, for example “squirrel copper sailboat”. I expect most people to take a screenshot with their phone to record it.
- Behind the scenes, each user has a RSA public/private key generated for them. The private key is encrypted using their new password, then both keys are stored in the database. The password itself is NOT stored.
- Once every user has generated and recorded their password, we can execute the Secret Santa assignments. This shuffles the participants and then assigns each person to the person after them in the list. It then uses their public keys to encrypt a message telling them who they should buy a gift for.
- Those encrypted messages are stored in the database too.
- Finally, each user can return to the site and enter their password to decrypt and view their message.
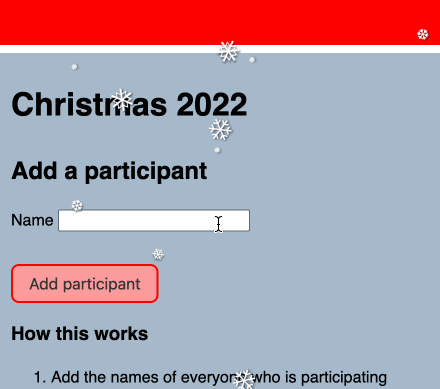
And here’s an animated GIF demo:
Building it as a Datasette plugin
This is a tiny app with a very small amount of persistence needed, so I decided to build it as a Datasette plugin on top of a couple of SQLite database tables.
In addition to giving me an excuse to try something new with my main project, this should also hopefully make it easy to deploy.
Most of the code is in the datasette_secret_santa/__init__.py file. I used a number of different plugin hooks:
-
startup()to create the database tables it needs when the server first starts (if they do not exist already) -
canned_queries()to add a canned SQL query for creating new Secret Santa groups, to save me from needing to build a custom UI for that -
register_routes()to register five new custom pages within Datasette -
extra_template_vars()to make an extra context variable available on the Datasette homepage, which is rendered using a custom template
Here are the routes:
@hookimpl
def register_routes():
    return [
        (r"^/secret-santa/(?P<slug>[^/]+)$", secret_santa),
        (r"^/secret-santa/(?P<slug>[^/]+)/add$", add_participant),
        (r"^/secret-santa/(?P<slug>[^/]+)/assign$", assign_participants),
        (r"^/secret-santa/(?P<slug>[^/]+)/set-password/(?P<id>\d+)$", set_password),
        (r"^/secret-santa/(?P<slug>[^/]+)/reveal/(?P<id>\d+)$", reveal),
    ]
-
/secret-santa/{slug}is the main page for a Secret Santa group. It shows a list of participants and a form to add a new participant. -
/secret-santa/{slug}/addis the endpoint for a form that adds a new participant. -
/secret-santa/{slug}/set-password/{id}is the page that lets a user generate and retrieve their password. -
/secret-santa/{slug}/reveal/{id}is the page where a user enters their password to reveal their Secret Santa assignment. -
/secret-santa/{slug}/assignis the endpoint that does the work of assigning participants to each other, and generating and saving encrypted message for each of them.
The cryptography
The earlier warning holds firm here: I am not a cryptographer. I’m just having fun. You should not imitate any of the code I wrote here without thoroughly reviewing it with someone who knows what they’re doing.
(I also used ChatGPT to write my first drafts of it, as described in this issue. Trusting cryptographic code generated by a large language model is a particularly bad idea!)
Disclaimers out of the way, here’s the code I wrote to generate and store the RSA keys:
async def generate_password_and_keys_for_user(db, participant_id):
    password = " ".join(random.sample(words, 3))

    private_key = rsa.generate_private_key(public_exponent=65537, key_size=2048)
    public_key = private_key.public_key()

    # Serialize the keys for storage
    private_key_serialized = private_key.private_bytes(
        encoding=serialization.Encoding.PEM,
        format=serialization.PrivateFormat.PKCS8,
        encryption_algorithm=serialization.BestAvailableEncryption(
            password.encode("utf-8")
        ),
    ).decode("utf-8")
    public_key_serialized = public_key.public_bytes(
        encoding=serialization.Encoding.PEM,
        format=serialization.PublicFormat.SubjectPublicKeyInfo,
    ).decode("utf-8")

    await db.execute_write(
        """
        update secret_santa_participants
        set
            password_issued_at = datetime('now'),
            public_key = :public_key,
            private_key = :private_key
        where id = :id
        """,
        {
            "id": participant_id,
            "public_key": public_key_serialized,
            "private_key": private_key_serialized,
        },
    )
    return password
As you can see, it uses rsa.generate_private_key() from the PyCA cryptography library to generate the public and private keys.
The options public_exponent=65537, key_size=2048 are recommended by the generate_private_key() documentation.
It then serializes them to PEM format strings that can be stored in the database.
The private key is serialized after being encrypted using the randomly generated password for that user. This produces a string that looks like this:
-----BEGIN ENCRYPTED PRIVATE KEY-----
...
-----END ENCRYPTED PRIVATE KEY-----
I had originally come up with my own scheme for this, involving AES encryption and a key derived from a hash of the raw password (which I planned to later run through bcrypt a few hundred thousand times)—I was very happy when I realized that there was a standard way to do this already.
The code that then assigns the participants and generates their encrypted messages looks like this:
# Assign participants
random.shuffle(participants)
for i, participant in enumerate(participants):
    assigned = participants[(i + 1) % len(participants)]
    message = "You should buy a gift for {}".format(assigned["name"])
    # Encrypt the message with their public key
    public_key = serialization.load_pem_public_key(
        participant["public_key"].encode("utf-8"), backend=default_backend()
    )
    secret_message_encrypted = public_key.encrypt(
        message.encode("utf-8"),
        padding.OAEP(
            mgf=padding.MGF1(algorithm=hashes.SHA256()),
            algorithm=hashes.SHA256(),
            label=None,
        ),
    )
    await db.execute_write(
        """
        update secret_santa_participants
        set secret_message_encrypted = :secret_message_encrypted
        where id = :id
        """,
        {
            "id": participant["id"],
            "secret_message_encrypted": secret_message_encrypted,
        },
    )
And finally, the code that decrypts the message when the user provides their password again:
data = await request.post_vars()
password = data.get("password", "").strip()
if not password:
    return await _error(
        datasette, request, "Please provide a password", status=400
    )
# Decrypt the private key with the password
try:
    private_key = decrypt_private_key_for_user(participant, password)
except ValueError:
    return await _error(datasette, request, "Incorrect password", status=400)
# Decrypt the secret message with the private key
decrypted_message = private_key.decrypt(
    participant["secret_message_encrypted"],
    padding.OAEP(
        mgf=padding.MGF1(algorithm=hashes.SHA256()),
        algorithm=hashes.SHA256(),
        label=None,
    ),
).decode("utf-8")
And some snowflakes
I spent all of five minutes on the visual design for it—the main feature of which is a thick red top border on body followed by a thinner white border to make it look like its wearing a Santa hat.
I did add some animated snowflakes though! I used this script Natalie Downe built back in 2010. It works great!
Deploying it on Glitch
This kind of project is a really great fit for Glitch, which offers free hosting with persistent file storage—perfect for SQLite—provided you don’t mind your projects going to sleep in between bouts of activity (unless you pay to “boost” them). A Secret Santa app is a perfect fit for this sort of hosting.
(You can remix my project to get your own copy of the app (with your own database) by clicking the “Remix” button.)
Since I had shipped the plugin up to PyPI already, deploying it on Glitch was a matter of creating a new project there containing this single glitch.json file:
{
  "install": "pip3 install --user datasette datasette-secret-santa -U",
  "start": "datasette --create .data/santa.db -p 3000"
}
This causes Glitch to install both datasette and datasette-secret-santa when the project first launches. It then starts the Datasette server running like this:
datasette --create .data/santa.db -p 3000
The --create flag tells Datasette to create a new SQLite database if one doesn’t already exist at that path. .data/ is a special directory on Glitch that won’t have its contents automatically tracked using their version control.
The -p 3000 flag tells the server to listen on port 3000, which is the Glitch default—traffic to the subdomain for the app will automatically be routed to that port.
And the database is public
Here’s a slightly surprising thing about this: the SQLite table containing all of the data—including the public keys and encrypted private keys—is visible for anyone with access to the instance to see!
Here’s that table for a demo I deployed on Glitch.
Once again, I am by no means a cryptography expert, and this isn’t something I would tolerate for any other application. But with the risk profile involved in a secret santa I think this is OK. I’m pretty sure you could brute force decrypt the private keys if you really wanted to, so it’s a good thing they’re not being used for anything else!
(This is also one of the reasons I didn’t let users pick their own passwords—by assigning generated passwords I can be 100% sure I don’t accidentally end up holding onto an encrypted copy of a credential that could be used for anything else.)
Self-contained apps as plugins
Something I find interesting about this project is that it demonstrates how a Datasette plugin can be used to provide a full, self-contained app.
I think this is a powerful pattern. It’s a neat way to take advantage of the tools I’ve built to help make Datasette easy to deploy—not just on Glitch but on platforms like Fly as well.
This is my first time using Datasette in this way and I found it to be a pleasantly productive way of building and deploying this kind of personal tool. I’m looking forward to trying this approach out for other projects in the future.
And if you know cryptography and can spot any glaring (or subtle) holes in the way my system works, please open an issue and let me know!
More recent articles
- A Fireside Chat with Cat and Thariq from the Claude Code team - 21st July 2026
- Kimi K3, and what we can still learn from the pelican benchmark - 16th July 2026
- The new GPT-5.6 family: Luna, Terra, Sol - 9th July 2026