Datasette’s new JSON write API: The first alpha of Datasette 1.0
2nd December 2022
This week I published the first alpha release of Datasette 1.0, with a significant new feature: Datasette core now includes a JSON API for creating and dropping tables and inserting, updating and deleting data.
Combined with Datasette’s existing APIs for reading and filtering table data and executing SELECT queries this effectively turns Datasette into a SQLite-backed JSON data layer for any application.
If you squint at it the right way, you could even describe it as offering a NoSQL interface to a SQL database!
My initial motivation for this work was to provide an API for loading data into my Datasette Cloud SaaS product—but now that I’ve got it working I’m realizing that it can be applied to a whole host of interesting things.
I shipped the 1.0a0 alpha on Wednesday, then spent the last two days ironing out some bugs (released in 1.0a1) and building some illustrative demos.
Scraping Hacker News to build an atom feed
My first demo reuses my scrape-hacker-news-by-domain project from earlier this year.
https://news.ycombinator.com/from?site=simonwillison.net is the page on Hacker News that shows submissions from my blog. I like to keep an eye on that page to see if anyone has linked to my work.
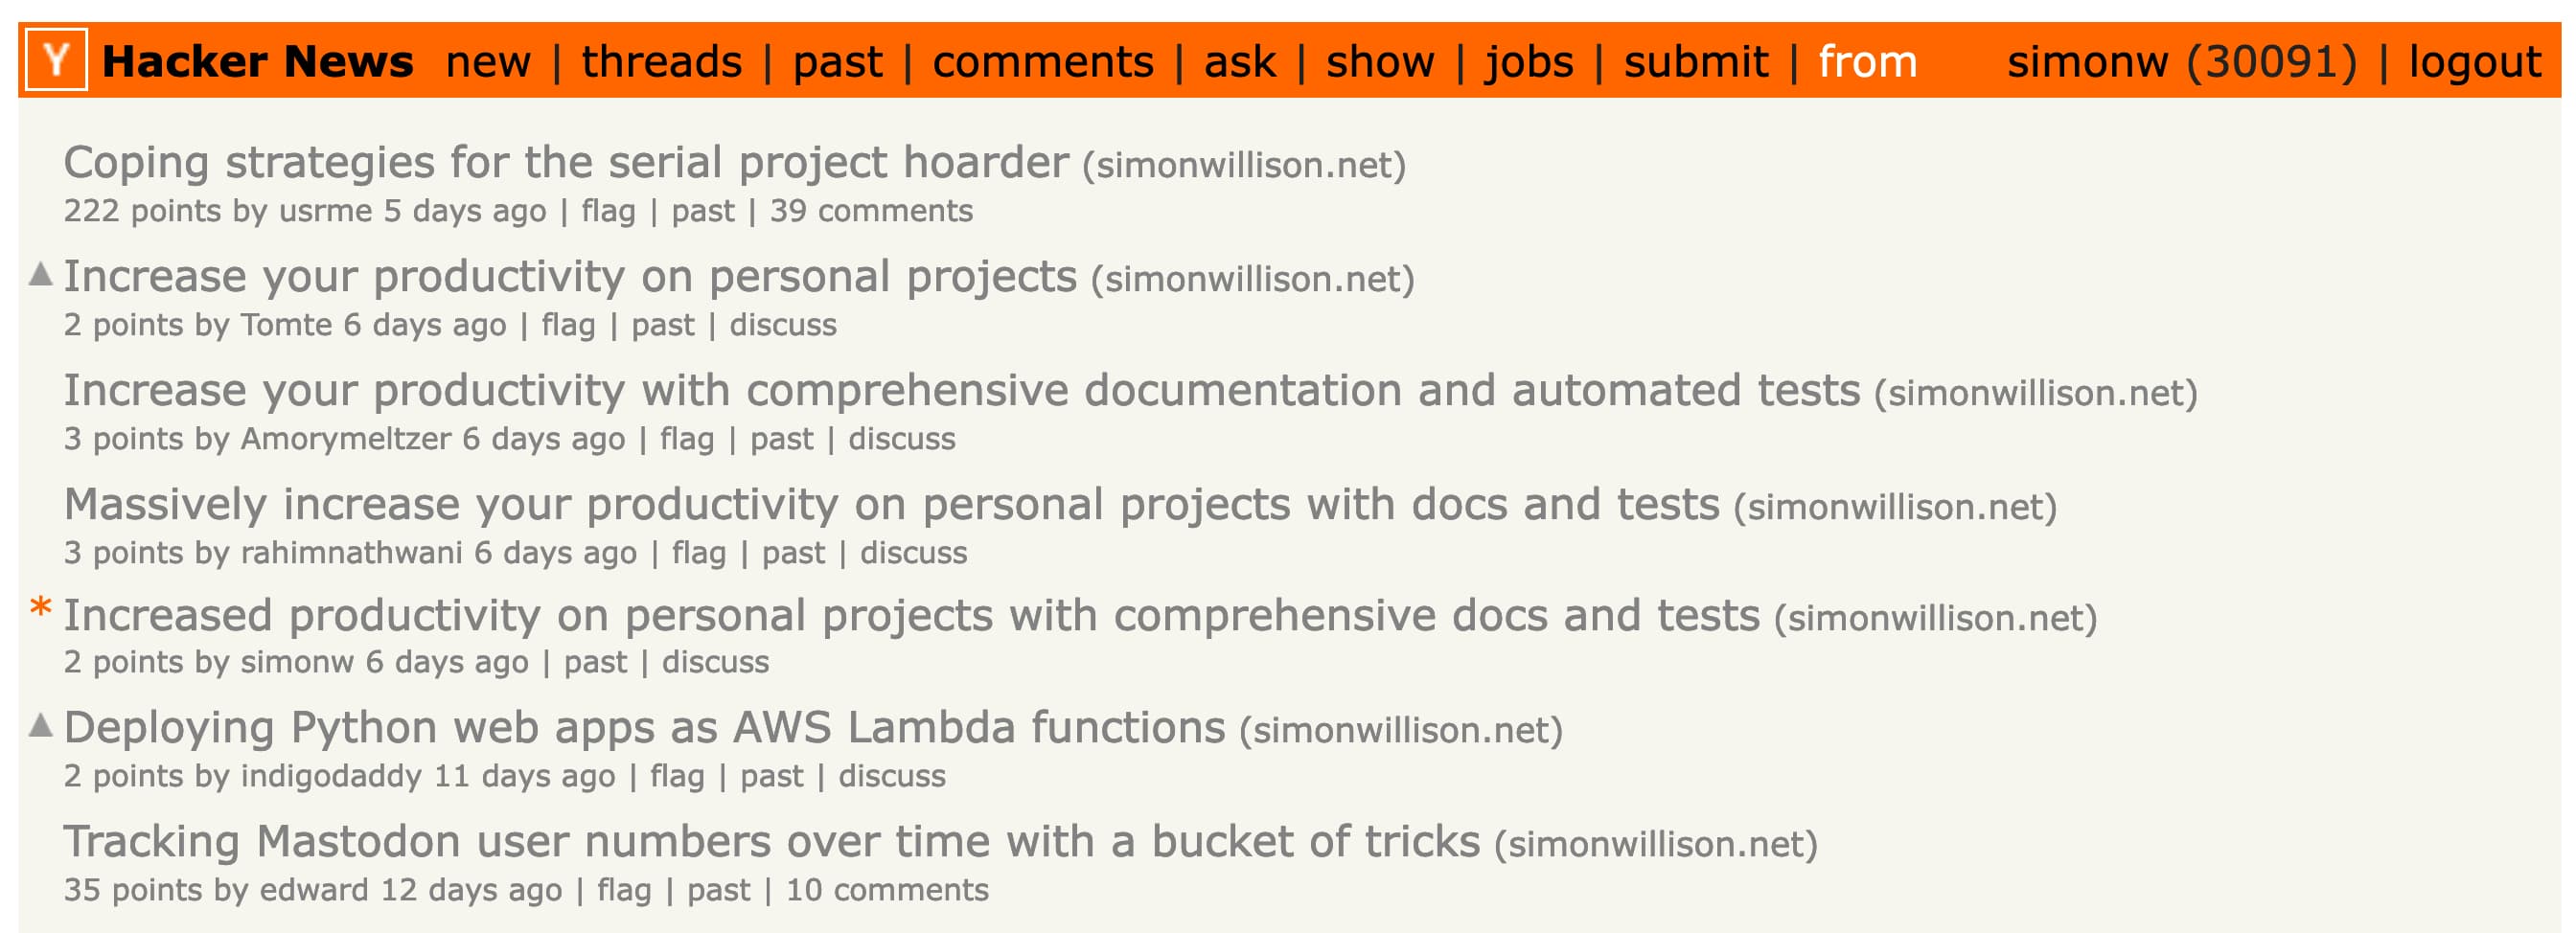
Data from that page is not currently available through the official Hacker News API... but it’s in an HTML format that’s pretty easy to scrape.
My shot-scraper command-line browser automation tool has the ability to execute JavaScript against a web page and return scraped data as JSON.
I wrote about that in Scraping web pages from the command line with shot-scraper, including a recipe for scraping that Hacker News page that looks like this:
shot-scraper javascript \
  "https://news.ycombinator.com/from?site=simonwillison.net" \
  -i scrape.js -o simonwillison-net.json
Here’s that scrape.js script.
I’ve been running a Git scraper that executes that scraping script using GitHub Actions for several months now, out of my simonw/scrape-hacker-news-by-domain repository.
Today I modified that script to also publish the data it has scraped to my personal Datasette Cloud account using the new API—and then used the datasette-atom plugin to generate an Atom feed from that data.
Here’s the new table in Datasette Cloud.
This is the bash script that runs in GitHub Actions and pushes the data to Datasette:
export SIMONWILLISON_ROWS=$(
  jq -n --argjson rows "$(cat simonwillison-net.json)" \
  '{ "rows": $rows, "replace": true }'
)
curl -X POST \
  https://simon.datasette.cloud/data/hacker_news_posts/-/insert \
  -H "Content-Type: application/json" \
  -H "Authorization: Bearer $DS_TOKEN" \
  -d "$SIMONWILLISON_ROWS"
$DS_TOKEN is an environment variable containing a signed API token, see the API token documentation for details.
I’m using jq here (with a recipe generated using GPT-3) to convert the scraped data into the JSON format needeed by the Datasette API. The result looks like this:
{
  "rows": [
    {
      "id": "33762438",
      "title": "Coping strategies for the serial project hoarder",
      "url": "https://simonwillison.net/2022/Nov/26/productivity/",
      "dt": "2022-11-27T12:12:56",
      "points": 222,
      "submitter": "usrme",
      "commentsUrl": "https://news.ycombinator.com/item?id=33762438",
      "numComments": 38
    }
  ],
  "replace": true
}
This is then POSTed up to the https://simon.datasette.cloud/data/hacker_news_posts/-/insert API endpoint.
The "rows" key is a list of rows to be inserted.
"replace": true tells Datasette to replace any existing rows with the same primary key. Without that, the API would return an error if any rows already existed.
The API also accepts "ignore": true which will cause it to ignore any rows that already exist.
Full insert API documentation is here.
Initially creating the table
Before I could insert any rows I needed to create the table.
I did that from the command-line too, using this recipe:
export ROWS=$(
  jq -n --argjson rows "$(cat simonwillison-net.json)" \
  '{ "table": "hacker_news_posts", "rows": $rows, "pk": "id" }'
)
# Use curl to POST some JSON to a URL
curl -X POST \
  https://simon.datasette.cloud/data/-/create \
  -H "Content-Type: application/json" \
  -H "Authorization: Bearer $DS_TOKEN" \
  -d $ROWS
This uses the same trick as above, but hits a different API endpoint: /data/-/create which is the endpoint for creating a table in the data.db database.
The JSON submitted to that endpoint looks like this:
{
  "table": "hacker_news_posts",
  "pk": "id",
  "rows": [
    {
      "id": "33762438",
      "title": "Coping strategies for the serial project hoarder",
      "url": "https://simonwillison.net/2022/Nov/26/productivity/",
      "dt": "2022-11-27T12:12:56",
      "points": 222,
      "submitter": "usrme",
      "commentsUrl": "https://news.ycombinator.com/item?id=33762438",
      "numComments": 38
    }
  ]
}
It’s almost the same shape as the /-/insert call above. That’s because it’s using a feature of the Datasette API inherited from sqlite-utils—it can create a table from a list of rows, automatically determining the correct schema.
If you already know your schema you can pass a "columns": [...] key instead, but I’ve found that this kind of automatic schema generation works really well in practice.
Datasette will let you call the create API like that multiple times, and if the table already exists it will insert new rows directly into the existing tables. I expect this to be a really convenient way to write automation scripts where you don’t want to bother checking if the table exists already.
Building an Atom feed
My end goal with this demo was to build an Atom feed I could subscribe to in my NetNewsWire feed reader.
I have a plugin for that already: datasette-atom, which lets you generate an Atom feed for any data in Datasette, defined using a SQL query.
I created a SQL view for this (using the datasette-write plugin, which is installed on Datasette Cloud):
CREATE VIEW hacker_news_posts_atom as select
  id as atom_id,
  title as atom_title,
  url,
  commentsUrl as atom_link,
  dt || 'Z' as atom_updated,
  'Submitter: ' || submitter || ' - ' || points || ' points, ' || numComments || ' comments' as atom_content
from
  hacker_news_posts
order by
  dt desc
limit
  100;
datasette-atom requires a table, view or SQL query that returns atom_id, atom_title and atom_updated columns—and will make use of atom_link and atom_content as well if they are present.
Datasette Cloud defaults to keeping all tables and views private—but a while ago I created the datasette-public plugin to provide a UI for making a table public.
It turned out this didn’t work for SQL views yet, so I fixed that—then used that option to make my view public. You can visit it at:
https://simon.datasette.cloud/data/hacker_news_posts_atom
And to get an Atom feed, just add .atom to the end of the URL:
https://simon.datasette.cloud/data/hacker_news_posts_atom.atom
Here’s what it looks like in NetNewsWire:
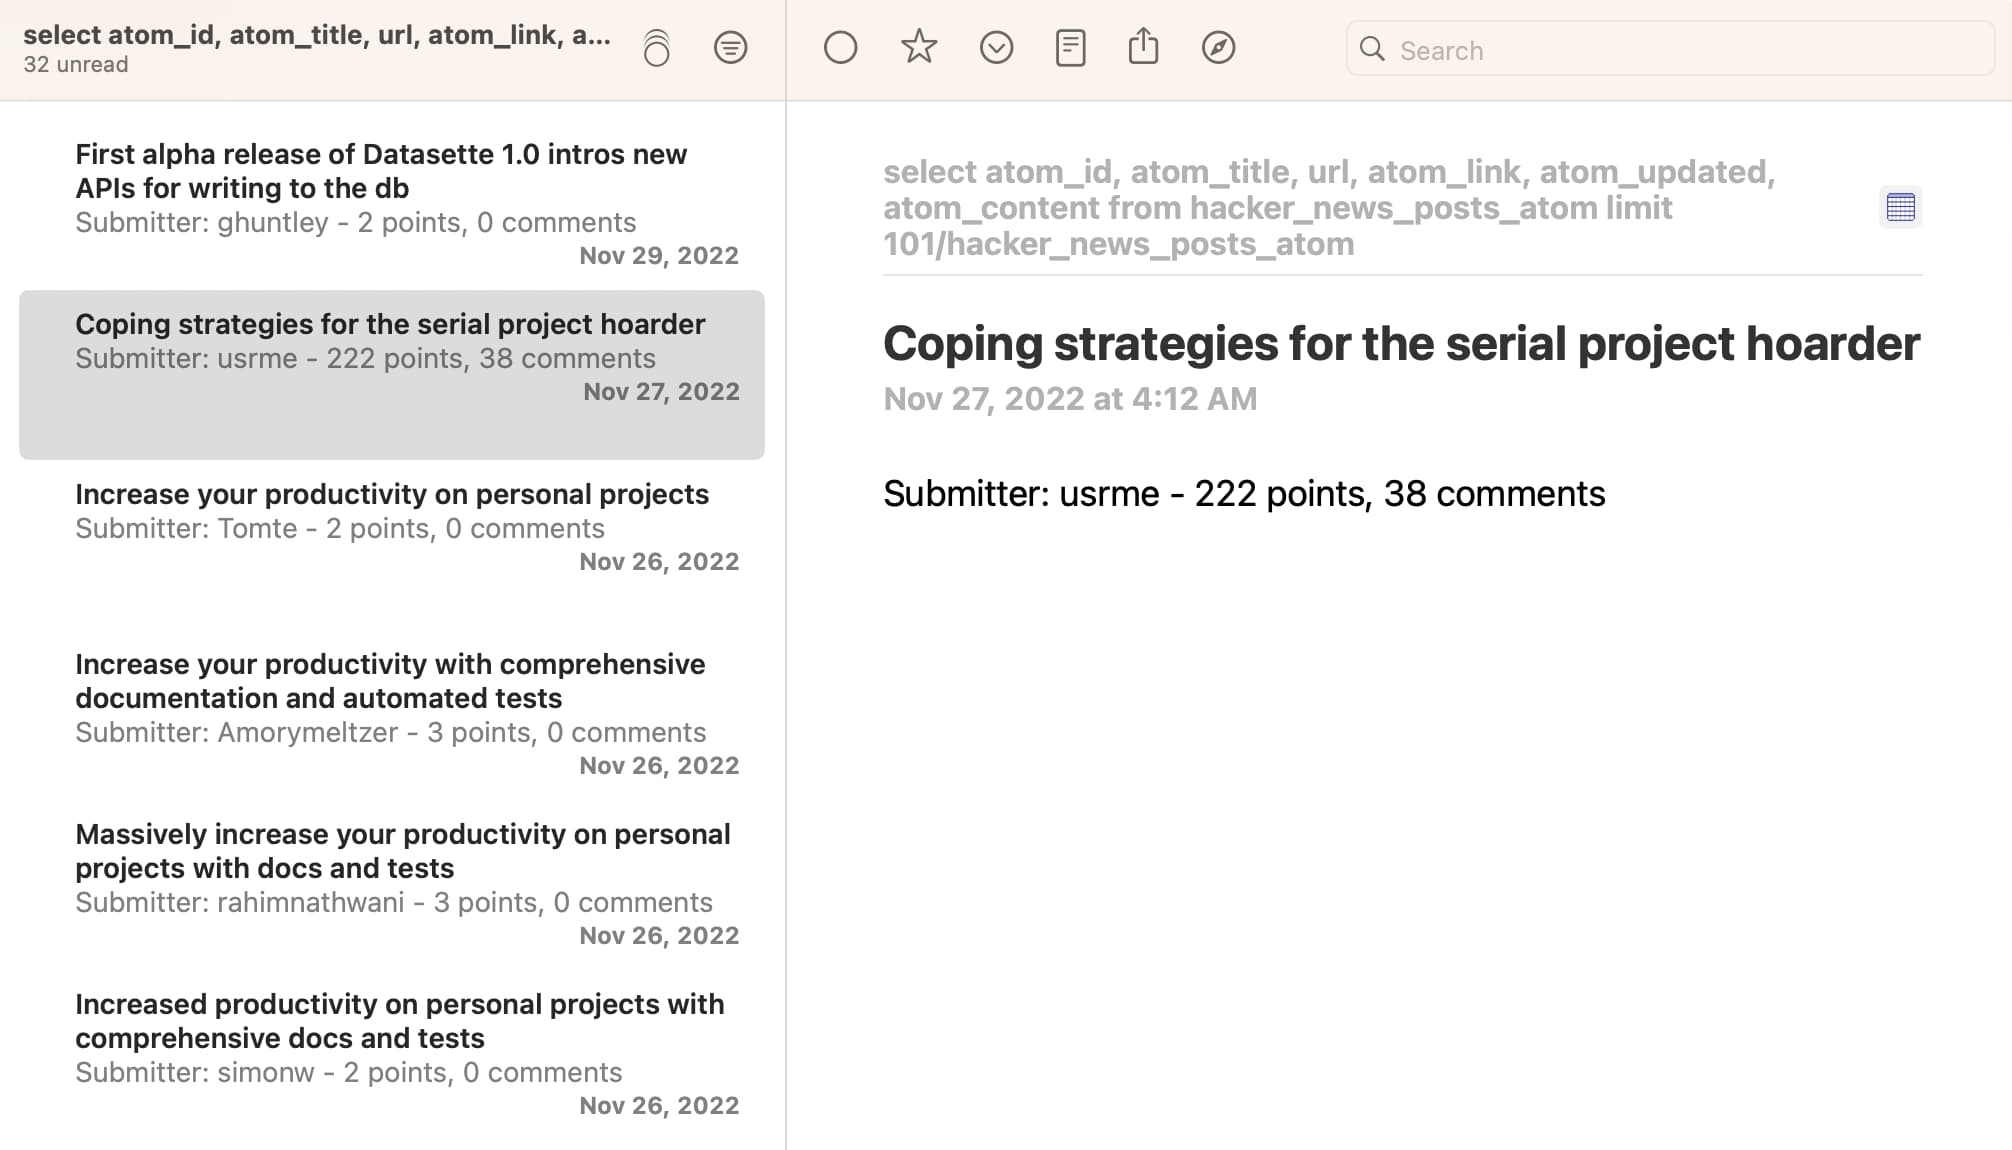
I’m pretty excited about being able to combine these tools in this way: it makes getting from scraped data to a Datasette table to an Atom feed a very repeatable process.
Building a TODO list application
My second demo explores what it looks like to develop custom applications against the new API.
TodoMVC is a project that provides the same TODO list interface built using dozens of different JavaScript frameworks, as a comparison tool.
I decided to use it to build my own TODO list application, using Datasette as the backend.
You can try it out at https://todomvc.datasette.io/—but be warned that the demo resets every 15 minutes so don’t use it for real task tracking!
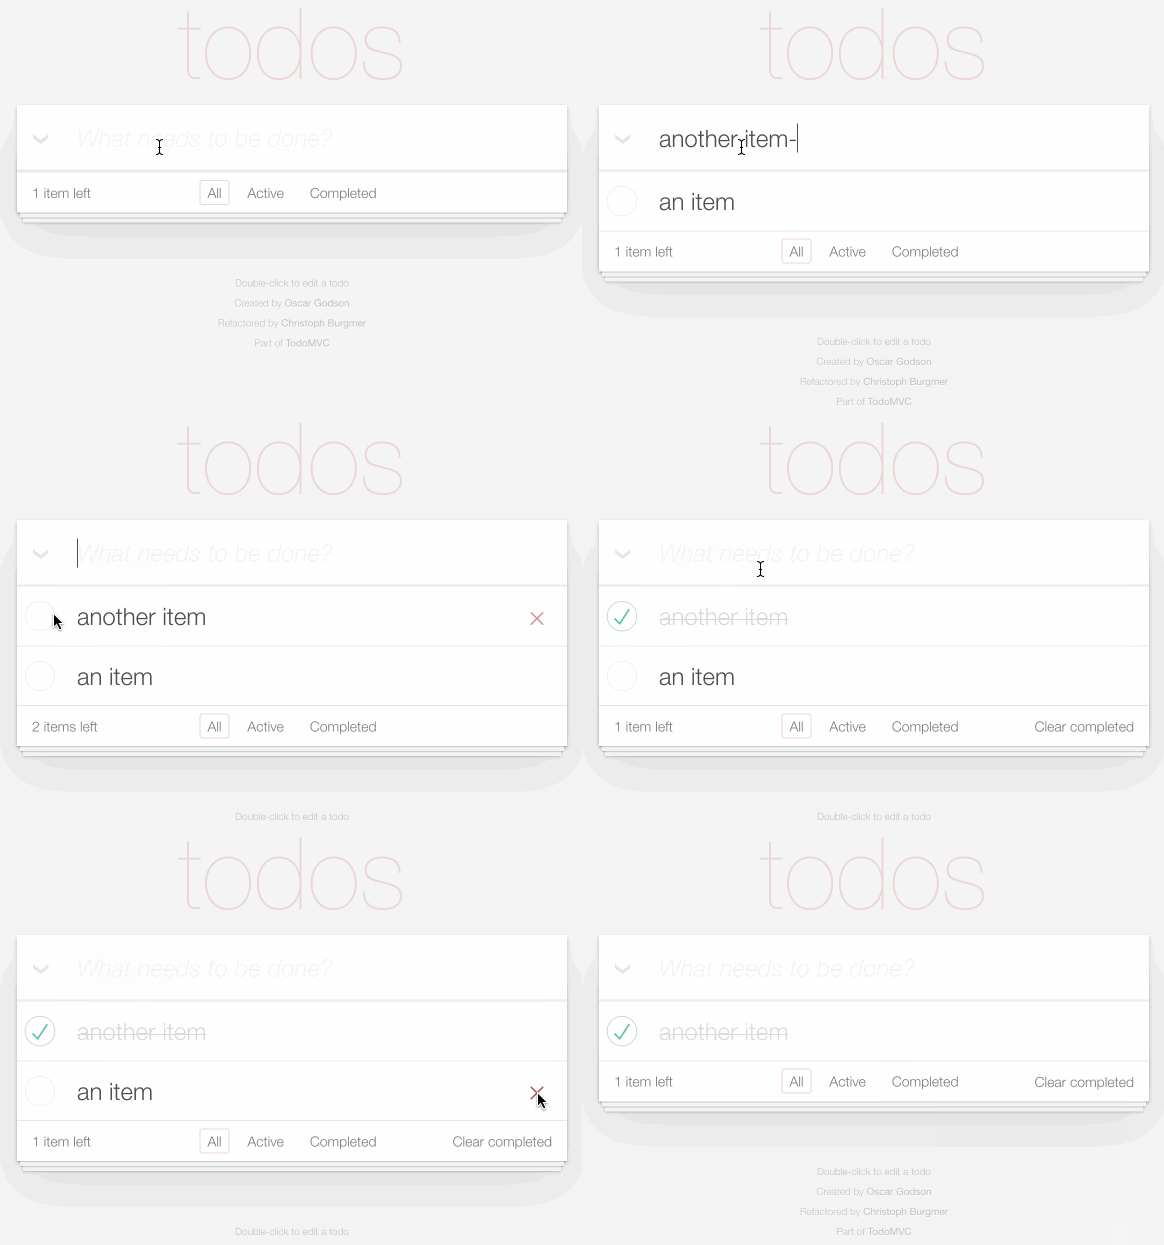
The source code for this demo lives in simonw/todomvc-datasette—which also serves the demo itself using GitHub Pages.
The code is based on the TodoMVC Vanilla JavaScript example. I used that unmodified, except for one file—store.js, which I modified to use the Datasette API instead of localStorage.
The demo currently uses a hard-coded authentication token, which is signed to allow actions to be performed against the https://latest.datasette.io/ demo instance as a user called todomvc.
That user is granted permissions in a custom plugin at the moment, but I plan to provide a more user-friendly way to do this in the future.
A couple of illustrative snippets of code. First, on page load this constructor uses the Datasette API to create the table used by the application:
function Store(name, callback) {
  callback = callback || function () {};

  // Ensure a table exists with this name
  let self = this;
  self._dbName = `todo_${name}`;
  fetch("https://latest.datasette.io/ephemeral/-/create", {
    method: "POST",
    mode: "cors",
    headers: {
      Authorization: `Bearer ${TOKEN}`,
      "Content-Type": "application/json",
    },
    body: JSON.stringify({
      table: self._dbName,
      columns: [
        {name: "id", type: "integer"},
        {name: "title", type: "text"},
        {name: "completed", type: "integer"},
      ],
      pk: "id",
    }),
  }).then(function (r) {
    callback.call(this, []);
  });
}
Most applications would run against a table that has already been created, but this felt like a good opportunity to show what table creation looks like.
Note that the table is being created using /ephemeral/-/create—this endpoint that lets you create tables in the ephemeral database, which is a temporary database that drops every table after 15 minutes. I built the datasette-ephemeral-tables plugin to make this possible.
Here’s the code which is called when a new TODO list item is created or updated:
Store.prototype.save = function (updateData, callback, id) {
// {title, completed}
callback = callback || function () {};
var table = this._dbName;

// If an ID was actually given, find the item and update each property
if (id) {
  fetch(
    `https://latest.datasette.io/ephemeral/${table}/${id}/-/update`,
    {
      method: "POST",
      mode: "cors",
      headers: {
        Authorization: `Bearer ${TOKEN}`,
        "Content-Type": "application/json",
      },
      body: JSON.stringify({update: updateData}),
    }
  )
    .then((r) => r.json())
    .then((data) => {
      callback.call(self, data);
    });
} else {
  // Save it and store ID
  fetch(`https://latest.datasette.io/ephemeral/${table}/-/insert`, {
    method: "POST",
    mode: "cors",
    headers: {
      Authorization: `Bearer ${TOKEN}`,
      "Content-Type": "application/json",
    },
    body: JSON.stringify({
      row: updateData,
    }),
  })
    .then((r) => r.json())
    .then((data) => {
      let row = data.rows[0];
      callback.call(self, row);
    });
}
};
TodoMVC passes an id if a record is being updated—which this code uses as a sign that the ...table/row-id/-/update API should be called (see update API documentation).
If the row doen’t have an ID it is inserted using table/-/insert, this time using the "row": key because we are only inserting a single row.
The hardest part of getting this to work was ensuring Datasette’s CORS mode worked correctly for writes. I had to add a new Access-Control-Allow-Methods header, which I shipped in Datasette 1.0a1 (see issue #1922).
Try the ephemeral hosted API
I built the datasette-ephemeral-tables plugin because I wanted to provide a demo instance of the write API that anyone could try out without needing to install Datasette themselves—but that wouldn’t leave me responsible for taking care of their data or cleaning up any of their mess.
You’re welcome to experiment with the API using the https://latest.datasette.io/ demo instance.
First, you’ll need to sign in as a root user. You can do that (no password required) using the button on this page.
Once signed in you can view the ephemeral database (which isn’t visible to anonymous users) here:
https://latest.datasette.io/ephemeral
You can use the API explorer to try out the different write APIs against it here:
https://latest.datasette.io/-/api
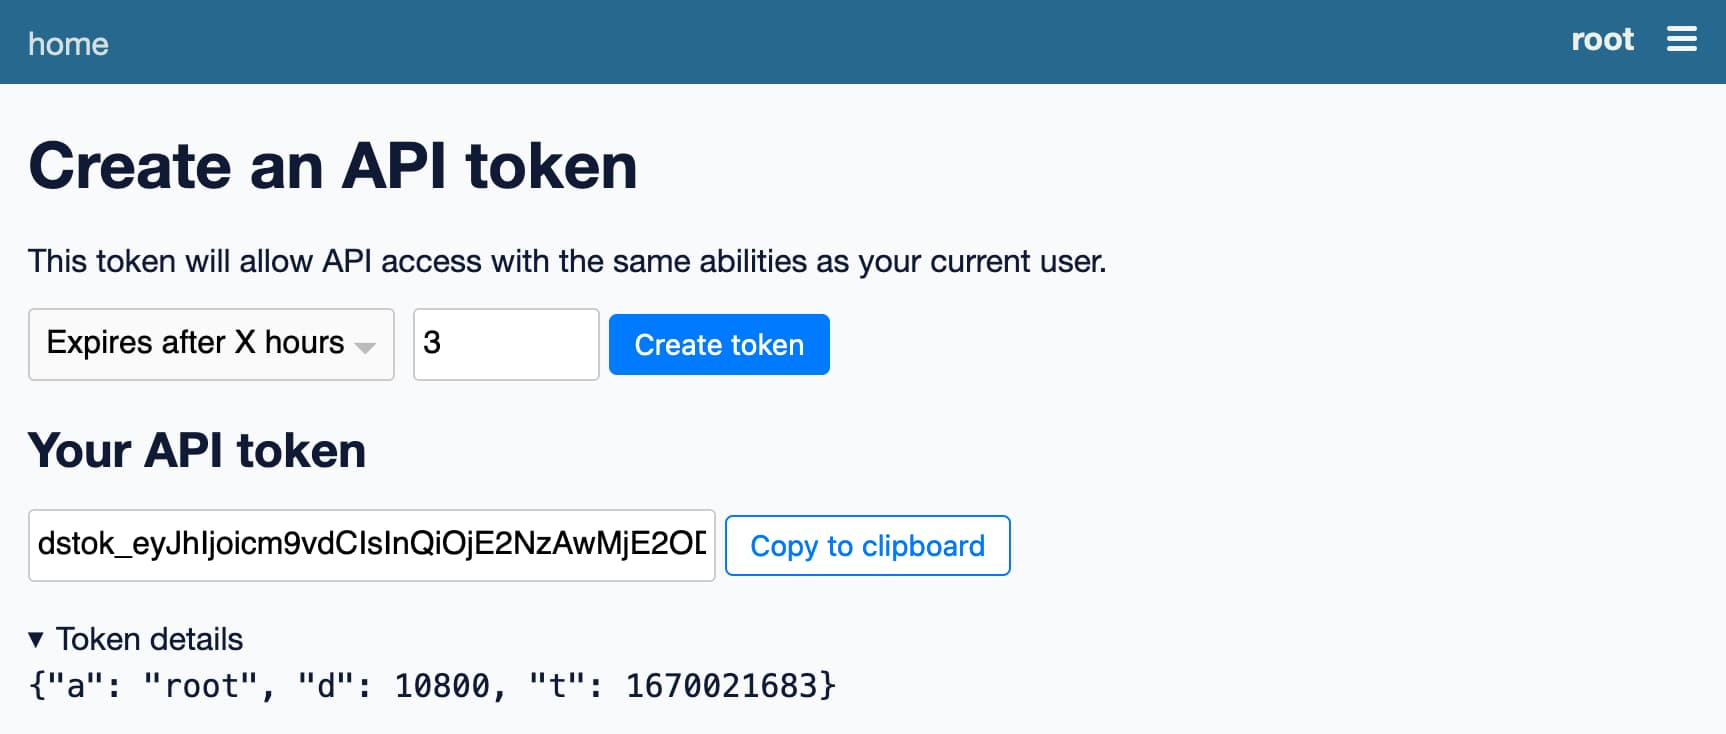
And you can create your own signed token for accessing the API on this page:
https://latest.datasette.io/-/create-token
The TodoMVC application described above also uses the ephemeral database, so you may see a todo_todos-vanillajs table appear there if anyone is playing with that demo.
Or run this on your own machine
You can install the latest Datasette alpha like this:
pip install datasette==1.0a1
Then create a database and sign in as the root user in order to gain access to the API:
datasette demo.db --create --root
Click on the link it outputs to sign in as the root user, then visit the API explorer to start trying out the API:
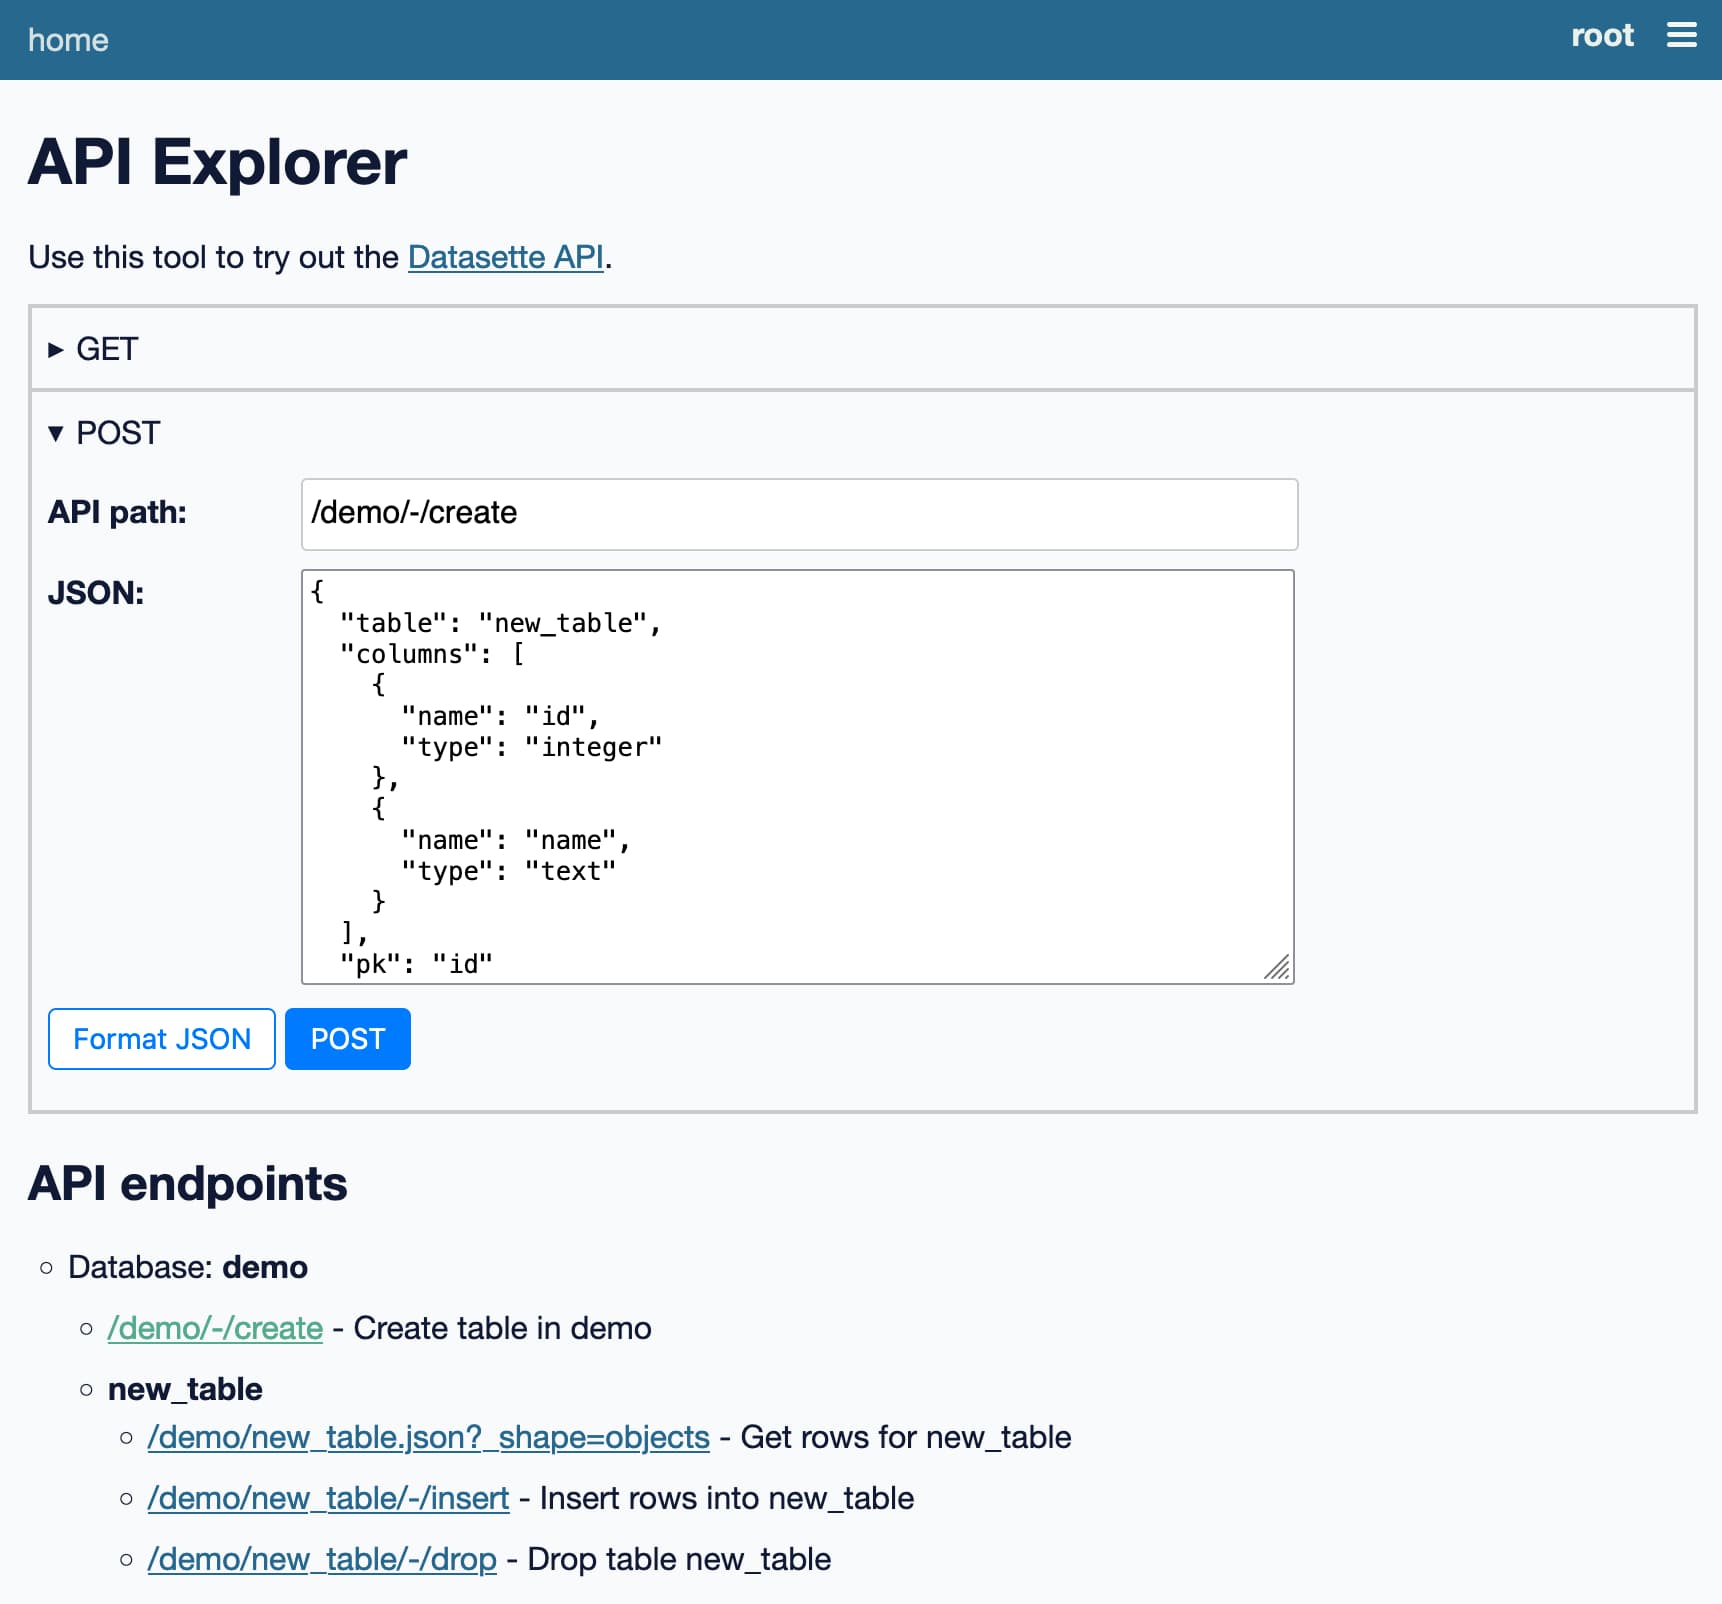
The API explorer works without a token at all, using your existing browser cookies.
If you want to try the API using curl or similar you can use this page to create a new signed API token for the root user:
http://127.0.0.1:8001/-/create-token
This token will become invalid if you restart the server, unless you fix the DATASETTE_SECRET environment variable to a stable string before you start the server:
export DATASETTE_SECRET=$(
  python3 -c 'print(__import__("secrets").token_hex(16))'
)
Check the Write API documentation for more details.
What’s next?
If you have feedback on these APIs, now is the time to share it! I’m hoping to ship Datasette 1.0 at the start of 2023, after which these APIs will be considered stable for hopefully a long time to come.
If you have thoughts or feedback (or questions) join us on the Datasette Discord. You can also file issue comments against Datasette itself.
My priority for the next 1.0 alpha is to bake in a small number of backwards incompatible changes to other aspects of Datasette’s JSON API that I’ve been hoping to include in 1.0 for a while.
I’m also going to be rolling out API support to my Datasette Cloud preview users. If you’re interested in trying that out you can request access here.
More recent articles
- Two new Showboat tools: Chartroom and datasette-showboat - 17th February 2026
- Deep Blue - 15th February 2026
- The evolution of OpenAI's mission statement - 13th February 2026
