Hacking the WiFi-enabled color screen GitHub Universe conference badge
28th October 2025
I’m at GitHub Universe this week (thanks to a free ticket from Microsoft). Yesterday I picked up my conference badge... which incorporates a full Raspberry Pi Raspberry Pi Pico microcontroller with a battery, color screen, WiFi and bluetooth.
GitHub Universe has a tradition of hackable conference badges—the badge last year had an eInk display. This year’s is a huge upgrade though—a color screen and WiFI connection makes this thing a genuinely useful little computer!
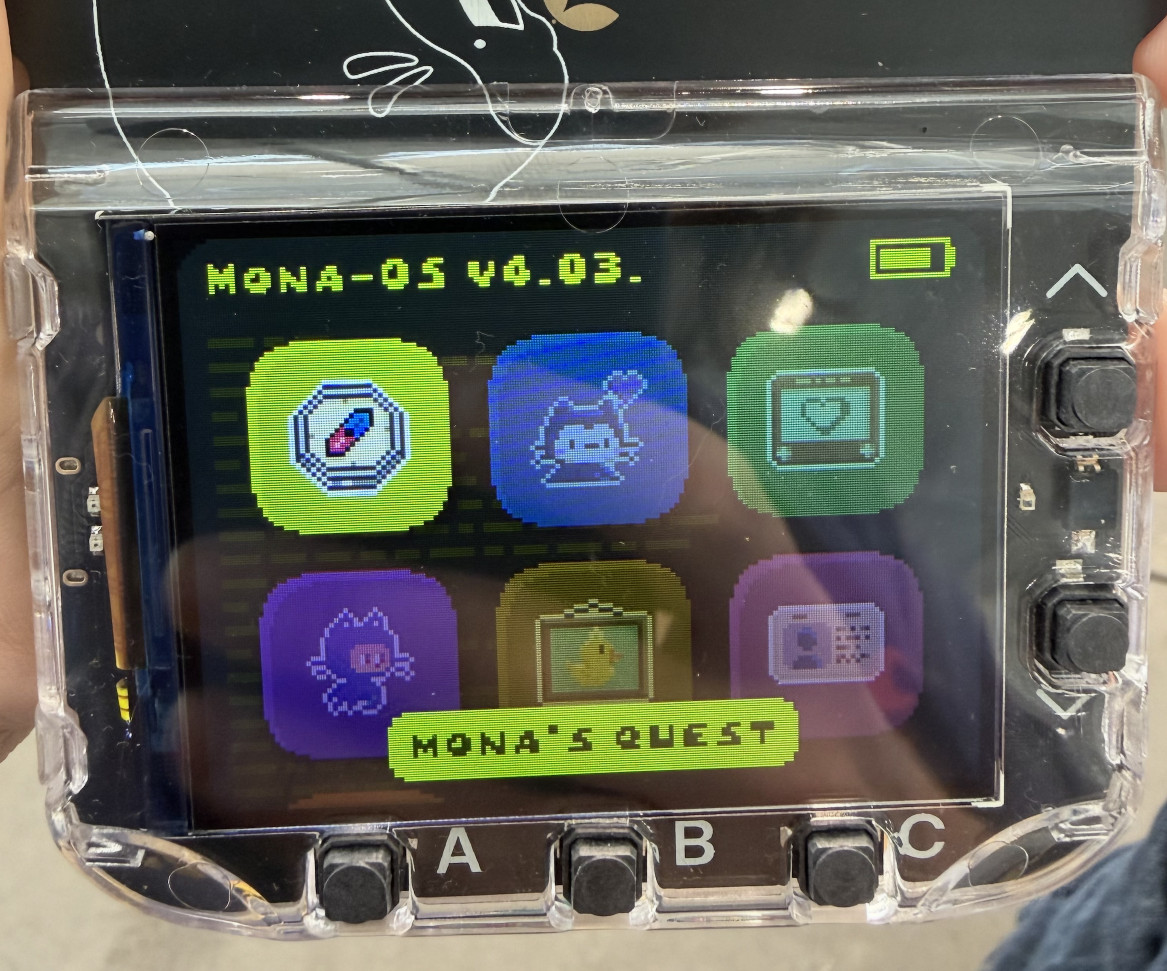
The only thing it’s missing is a keyboard—the device instead provides five buttons total—Up, Down, A, B, C. It might be possible to get a bluetooth keyboard to work though I’ll believe that when I see it—there’s not a lot of space on this device for a keyboard driver.
Everything is written using MicroPython, and the device is designed to be hackable: connect it to a laptop with a USB-C cable and you can start modifying the code directly on the device.
Getting setup with the badge
Out of the box the badge will play an opening animation (implemented as a sequence of PNG image frames) and then show a home screen with six app icons.
The default apps are mostly neat Octocat-themed demos: a flappy-bird clone, a tamagotchi-style pet, a drawing app that works like an etch-a-sketch, an IR scavenger hunt for the conference venue itself (this thing has an IR sensor too!), and a gallery app showing some images.
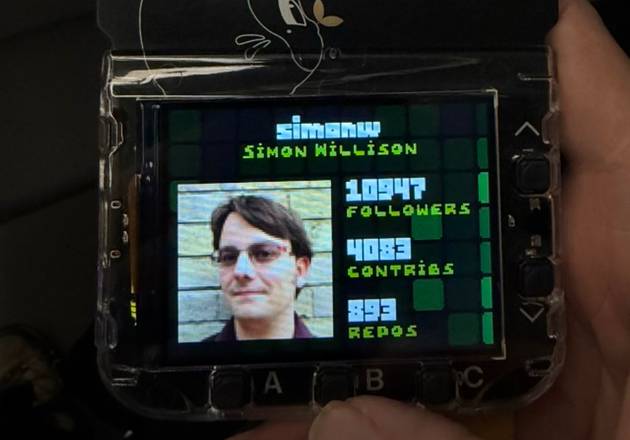
The sixth app is a badge app. This will show your GitHub profile image and some basic stats, but will only work if you dig out a USB-C cable and make some edits to the files on the badge directly.
I did this on a Mac. I plugged a USB-C cable into the badge which caused MacOS to treat it as an attached drive volume. In that drive are several files including secrets.py. Open that up, confirm the WiFi details are correct and add your GitHub username. The file should look like this:
WIFI_SSID = "..."
WIFI_PASSWORD = "..."
GITHUB_USERNAME = "simonw"
The badge comes with the SSID and password for the GitHub Universe WiFi network pre-populated.
That’s it! Unmount the disk, hit the reboot button on the back of the badge and when it comes back up again the badge app should look something like this:
Building your own apps
Here’s the official documentation for building software for the badge.
When I got mine yesterday the official repo had not yet been updated, so I had to figure this out myself.
I copied all of the code across to my laptop, added it to a Git repo and then fired up Claude Code and told it:
Investigate this code and add a detailed README
Here’s the result, which was really useful for getting a start on understanding how it all worked.
Each of the six default apps lives in a apps/ folder, for example apps/sketch/ for the sketching app.
There’s also a menu app which powers the home screen. That lives in apps/menu/. You can edit code in here to add new apps that you create to that screen.
I told Claude:
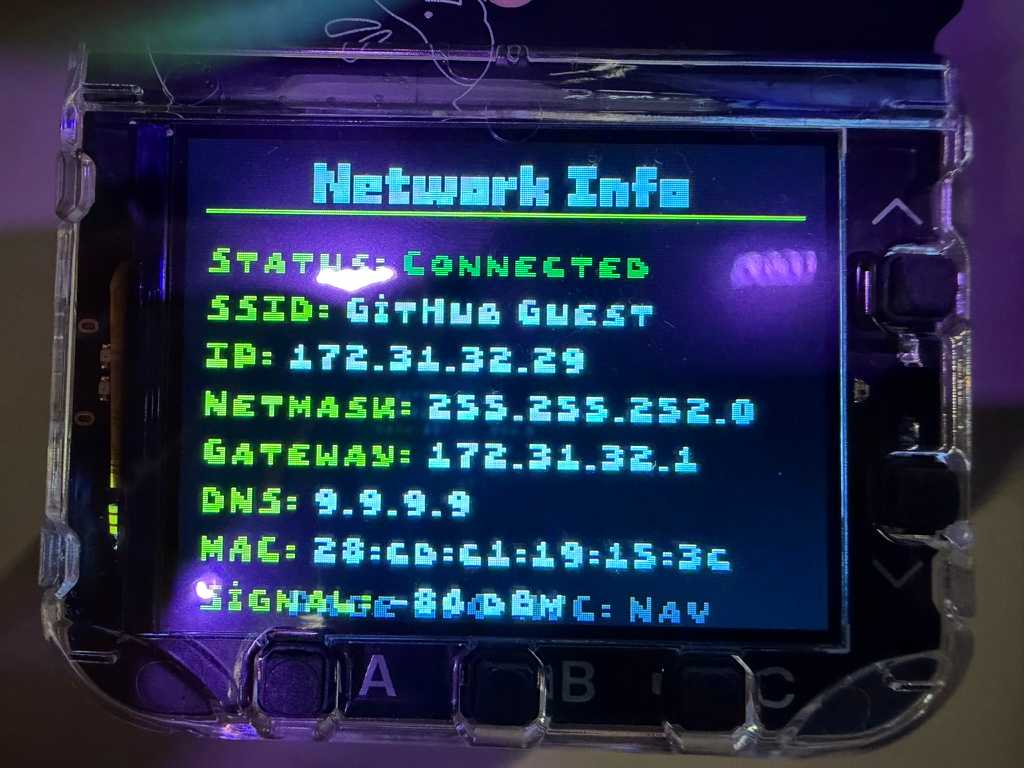
Add a new app to it available from the menu which shows network status and other useful debug info about the machine it is running on
This was a bit of a long-shot, but it totally worked!
The first version had an error:
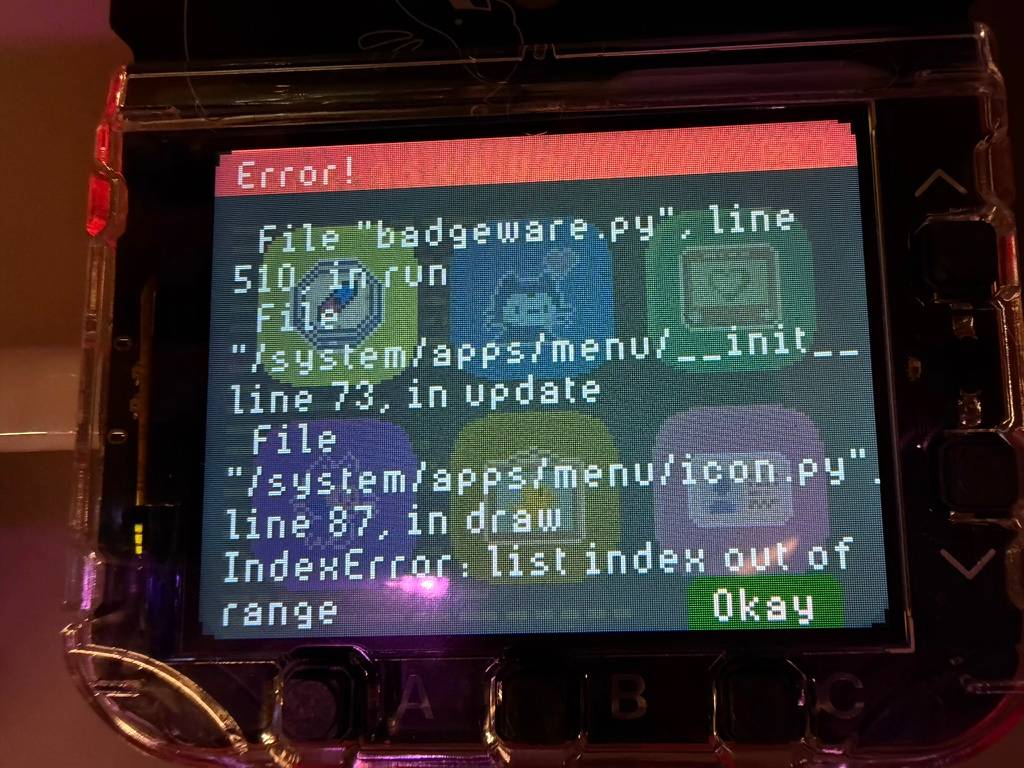
I OCRd that photo (with the Apple Photos app) and pasted the message into Claude Code and it fixed the problem.
This almost worked... but the addition of a seventh icon to the 2x3 grid meant that you could select the icon but it didn’t scroll into view. I had Claude fix that for me too.
Here’s the code for apps/debug/__init__.py, and the full Claude Code transcript created using my terminal-to-HTML app described here.
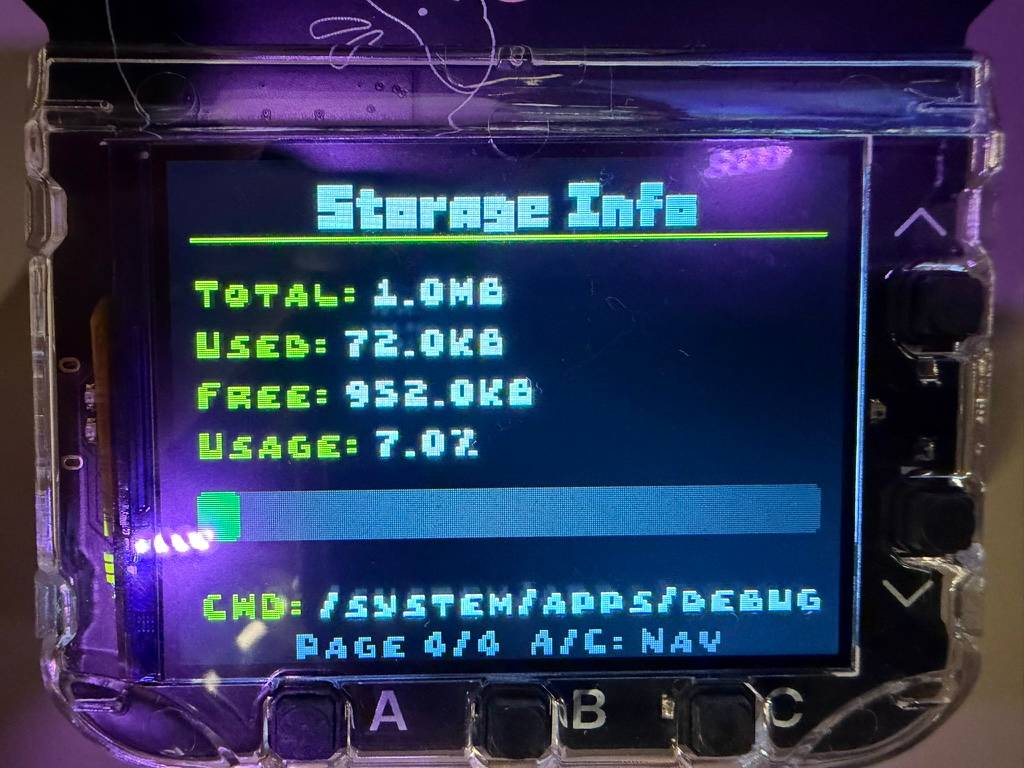
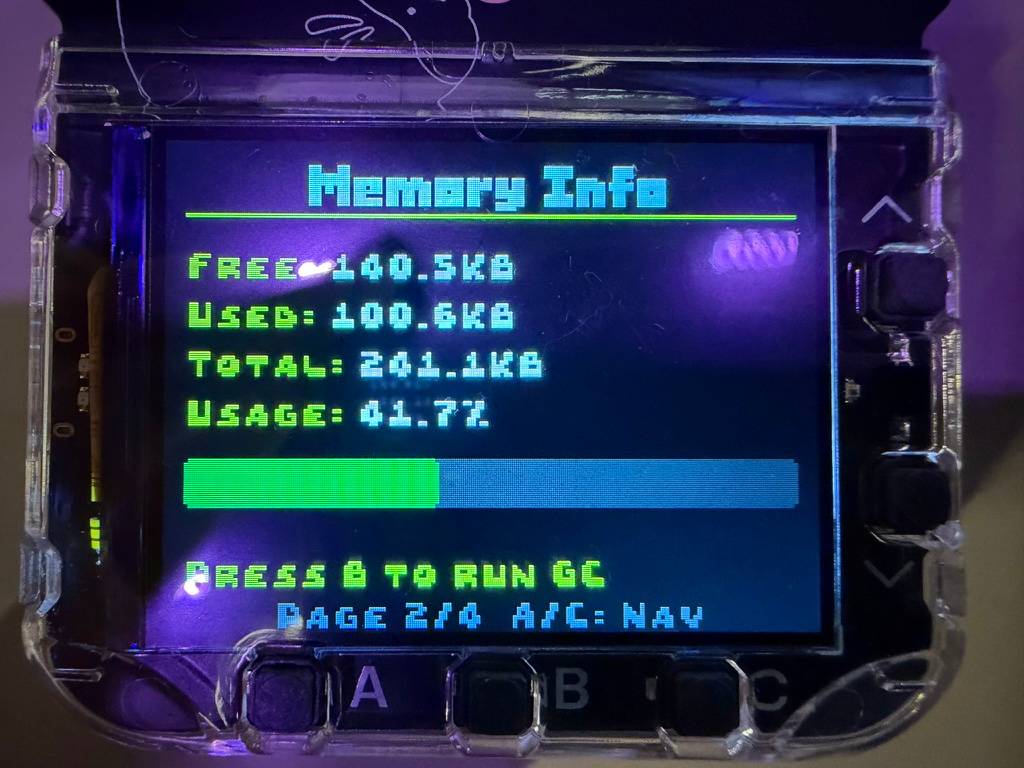
Here are the four screens of the debug app:

An icon editor
The icons used on the app are 24x24 pixels. I decided it would be neat to have a web app that helps build those icons, including the ability to start by creating an icon from an emoji.
I bulit this one using Claude Artifacts. Here’s the result, now available at tools.simonwillison.net/icon-editor:
![]()
And a REPL
I noticed that last year’s badge configuration app (which I can’t find in github.com/badger/badger.github.io any more, I think they reset the history on that repo?) worked by talking to MicroPython over the Web Serial API from Chrome. Here’s my archived copy of that code.
Wouldn’t it be useful to have a REPL in a web UI that you could use to interact with the badge directly over USB?
I pointed Claude Code at a copy of that repo and told it:
Based on this build a new HTML with inline JavaScript page that uses WebUSB to simply test that the connection to the badge works and then list files on that device using the same mechanism
It took a bit of poking (here’s the transcript) but the result is now live at tools.simonwillison.net/badge-repl. It only works in Chrome—you’ll need to plug the badge in with a USB-C cable and then click “Connect to Badge”.
![Badge Interactive REPL. Note: This tool requires the Web Serial API (Chrome/Edge on desktop). Connect to Badge, Disconnect and Clear Terminal buttons. Then a REPL interface displaying: Ready to connect. Click "Connect to Badge" to start.Traceback (most recent call last):ddae88e91.dirty on 2025-10-20; GitHub Badger with RP2350 Type "help()" for more information. >>> MicroPython v1.14-5485.gddae88e91.dirty on 2025-10-20; GitHub Badger with RP2350 Type "help()" for more information. >>> os.listdir() ['icon.py', 'ui.py', 'init.py', '._init.py', '._icon.py'] >>> machine.freq() 200000000 >>> gc.mem_free() 159696 >>> help() Welcome to MicroPython!](https://static.simonwillison.net/static/2025/badge-repl.jpg)
Get hacking
If you’re a GitHub Universe attendee I hope this is useful. The official badger.github.io site has plenty more details to help you get started.
There isn’t yet a way to get hold of this hardware outside of GitHub Universe—I know they had some supply chain challenges just getting enough badges for the conference attendees!
It’s a very neat device, built for GitHub by Pimoroni in Sheffield, UK. A version of this should become generally available in the future under the name “Pimoroni Tufty 2350”.
Update: Setup with iPhone only
If you don’t have a laptop with you it’s still possible to start hacking on the device using just a USB-C cable.
Plug the badge into the phone, hit the reset button on the back twice to switch it into disk mode and open the iPhone Files app—the badge should appear as a mounted disk called BADGER.
I used Textastic to edit that secrets.py and configure a new badge, then hit reset again to restart it.
More recent articles
- Running Pydantic's Monty Rust sandboxed Python subset in WebAssembly - 6th February 2026
- Distributing Go binaries like sqlite-scanner through PyPI using go-to-wheel - 4th February 2026
- Moltbook is the most interesting place on the internet right now - 30th January 2026