How to build, test and publish an open source Python library
4th November 2021
At PyGotham this year I presented a ten minute workshop on how to package up a new open source Python library and publish it to the Python Package Index. Here is the video and accompanying notes, which should make sense even without watching the talk.
The video
PyGotham arrange for sign language interpretation for all of their talks, which is really cool. Since those take up a portion of the screen (and YouTube don’t yet have a way to apply them as a different layer) I’ve also made available a copy of the original video without the sign language.
Update 29th July 2022: There is a more modern way to create Python packages that uses pyproject.toml files instead of setup.py. This tutorial on Packaging Python Projects from the PyPA shows how to do this in detail.
Packaging a single module
I used this code which I’ve been copying and pasting between my own projects for over a decade.
BaseConverter is a simple class that can convert an integer to a shortened character string and back again, for example:
>>> pid = BaseConverter("bcdfghkmpqrtwxyz")
>>> pid.from_int(1234)
"gxd"
>>> pid.to_int("gxd")
1234
To turn this into a library, first I created a pids/ directory (I’ve chosen that name because it’s available on PyPI).
To turn that code into a package:
-
mkdir pids && cd pids -
Create
pids.pyin that directory with the contents of this file -
Create a new
setup.pyfile in that folder containing the following:from setuptools import setup setup( name="pids", version="0.1", description="A tiny Python library for generating public IDs from integers", author="Simon Willison", url="https://github.com/simonw/...", license="Apache License, Version 2.0", py_modules=["pids"], )
-
Run
python3 setup.py sdistto create the packaged source distribution,dist/pids-0.1.tar.gz(I’ve since learned that it’s better to run
python3 -m buildhere instead, see Why you shouldn’t invoke setup.py directly).
This is all it takes: a setup.py file with some metadata, then a single command to turn that into a packaged .tar.gz file.
Testing it in a Jupyter notebook
Having created that file, I demonstrated how it can be tested in a Jupyter notebook.
Jupyter has a %pip magic command which runs pip to install a package into the same environment as the current Jupyter kernel:
%pip install /Users/simon/Dropbox/Presentations/2021/pygotham/pids/dist/pids-0.1.tar.gz
Having done this, I could excute the library like so:
>>> import pids
>>> pids.pid.from_int(1234)
'gxd'
Uploading the package to PyPI
I used twine (pip install twine) to upload my new package to PyPI.
You need to create a PyPI account before running this command.
By default you need to paste in the PyPI account’s username and password:
% twine upload dist/pids-0.1.tar.gz
Uploading distributions to https://upload.pypi.org/legacy/
Enter your username: simonw
Enter your password:
Uploading pids-0.1.tar.gz
100%|██████████████████████████████████████| 4.16k/4.16k [00:00<00:00, 4.56kB/s]

View at:
https://pypi.org/project/pids/0.1/
The release is now live at https://pypi.org/project/pids/0.1/—and anyone can run pip install pids to install it.
Adding documentation
If you visit the 0.1 release page you’ll see the following message:
The author of this package has not provided a project description
To fix this I added a README.md file with some basic documentation, written in Markdown:
# pids

Create short public identifiers based on integer IDs.

## Installation

    pip install pids

## Usage

    from pids import pid
    public_id = pid.from_int(1234)
    # public_id is now "gxd"
    id = pid.to_int("gxd")
    # id is now 1234
Then I modified my setup.py file to look like this:
from setuptools import setup
import os

def get_long_description():
    with open(
        os.path.join(os.path.dirname(__file__), "README.md"),
        encoding="utf8",
    ) as fp:
        return fp.read()

setup(
    name="pids",
    version="0.1.1",
    long_description=get_long_description(),
    long_description_content_type="text/markdown",
    description="A tiny Python library for generating public IDs from integers",
    author="Simon Willison",
    url="https://github.com/simonw/...",
    license="Apache License, Version 2.0",
    py_modules=["pids"],
)
The get_long_description() function reads that README.md file into a Python string.
The following two extra arguments to setup() add that as metadata visible to PyPI:
long_description=get_long_description(),
long_description_content_type="text/markdown",
I also updated the version number to 0.1.1 in preparation for a new release.
Running python3 setup.py sdist created a new file called dist/pids-0.1.1.tar.gz—I then uploaded that file using twine upload dist/pids-0.1.1.tar.gz which created a new release with a visible README at https://pypi.org/project/pids/0.1.1/
Adding some tests
I like using pytest for tests, so I added that as a test dependency by modifying setup.py to add the following line:
extras_require={"test": ["pytest"]},
Next, I created a virtual environment and installed my package and its test dependencies into an “editable” mode like so:
# Create and activate environment
python3 -m venv venv
source venv/bin/activate
# Install editable module, plus pytest
pip install -e '.[test]'
Now I can run the tests!
(venv) pids % pytest
============================= test session starts ==============================
platform darwin -- Python 3.9.6, pytest-6.2.5, py-1.10.0, pluggy-1.0.0
rootdir: /Users/simon/Dropbox/Presentations/2021/pygotham/pids
collected 0 items

============================ no tests ran in 0.01s =============================
There aren’t any tests yet. I created a tests/ folder and dropped in a test_pids.py file that looked like this:
import pytest
import pids

def test_from_int():
    assert pids.pid.from_int(1234) == "gxd"

def test_to_int():
    assert pids.pid.to_int("gxd") == 1234
Running pytest in the project directory now runs those tests:
(venv) pids % pytest
============================= test session starts ==============================
platform darwin -- Python 3.9.6, pytest-6.2.5, py-1.10.0, pluggy-1.0.0
rootdir: /Users/simon/Dropbox/Presentations/2021/pygotham/pids
collected 2 items

tests/test_pids.py ..                                                    [100%]

============================== 2 passed in 0.01s ===============================
Creating a GitHub repository
Time to publish the source code on GitHub.
I created a repository using the form at https://github.com/new
Having created the simonw/pids repository, I ran the following commands locally to push my code to it (mostly copy and pasted from the GitHub example):
git init
git add README.md pids.py setup.py tests/test_pids.py
git commit -m "first commit"
git branch -M main
git remote add origin git@github.com:simonw/pids.git
git push -u origin main
Running the tests with GitHub Actions
I copied in a .github/workflows folder from another project with two files, test.yml and publish.yml. The .github/workflows/test.yml file contained this:
name: Test

on: [push]

jobs:
  test:
    runs-on: ubuntu-latest
    strategy:
      matrix:
        python-version: [3.6, 3.7, 3.8, 3.9]
    steps:
    - uses: actions/checkout@v2
    - name: Set up Python ${{ matrix.python-version }}
      uses: actions/setup-python@v2
      with:
        python-version: ${{ matrix.python-version }}
    - uses: actions/cache@v2
      name: Configure pip caching
      with:
        path: ~/.cache/pip
        key: ${{ runner.os }}-pip-${{ hashFiles('**/setup.py') }}
        restore-keys: |
          ${{ runner.os }}-pip-
    - name: Install dependencies
      run: |
        pip install -e '.[test]'
    - name: Run tests
      run: |
        pytest
The matrix block there causes the job to run four times, on four different versions of Python.
The action steps do the following:
- Checkout the current repository
- Install the specified Python version
- Configure GitHub’s action caching mechanism for the
~/.cache/pipdirectory—this avoids installing the same files from PyPI over the internet the next time the workflow runs - Install the test dependencies
- Run the tests
I added and pushed these new files:
git add .github
git commit -m "GitHub Actions"
git push
The Actions tab in my repository instantly ran the test suite, and when it passed added a green checkmark to my commit.
Publishing a new release using GitHub
The .github/workflows/publish.yml workflow is triggered by new GitHub releases. It tests them and then, if the tests pass, publishes them up to PyPI using twine.
The workflow looks like this:
name: Publish Python Package

on:
  release:
    types: [created]

jobs:
  test:
    runs-on: ubuntu-latest
    strategy:
      matrix:
        python-version: [3.6, 3.7, 3.8, 3.9]
    steps:
    - uses: actions/checkout@v2
    - name: Set up Python ${{ matrix.python-version }}
      uses: actions/setup-python@v2
      with:
        python-version: ${{ matrix.python-version }}
    - uses: actions/cache@v2
      name: Configure pip caching
      with:
        path: ~/.cache/pip
        key: ${{ runner.os }}-pip-${{ hashFiles('**/setup.py') }}
        restore-keys: |
          ${{ runner.os }}-pip-
    - name: Install dependencies
      run: |
        pip install -e '.[test]'
    - name: Run tests
      run: |
        pytest
  deploy:
    runs-on: ubuntu-latest
    needs: [test]
    steps:
    - uses: actions/checkout@v2
    - name: Set up Python
      uses: actions/setup-python@v2
      with:
        python-version: '3.9'
    - uses: actions/cache@v2
      name: Configure pip caching
      with:
        path: ~/.cache/pip
        key: ${{ runner.os }}-publish-pip-${{ hashFiles('**/setup.py') }}
        restore-keys: |
          ${{ runner.os }}-publish-pip-
    - name: Install dependencies
      run: |
        pip install setuptools wheel twine
    - name: Publish
      env:
        TWINE_USERNAME: __token__
        TWINE_PASSWORD: ${{ secrets.PYPI_TOKEN }}
      run: |
        python setup.py sdist bdist_wheel
        twine upload dist/*
It contains two jobs: the test job the tests again—we should never publish a package without first ensuring that the test suite passes—and then the deploy job runs python setup.py sdist bdist_wheel followed by twine upload dist/* to upload the resulting packages.
(My latest version of this uses python3 -m build here instead.)
Before publishing a package with this action, I needed to create a PYPI_TOKEN that the action could use to authenticate with my PyPI account.
I used the https://pypi.org/manage/account/token/ page to create that token:
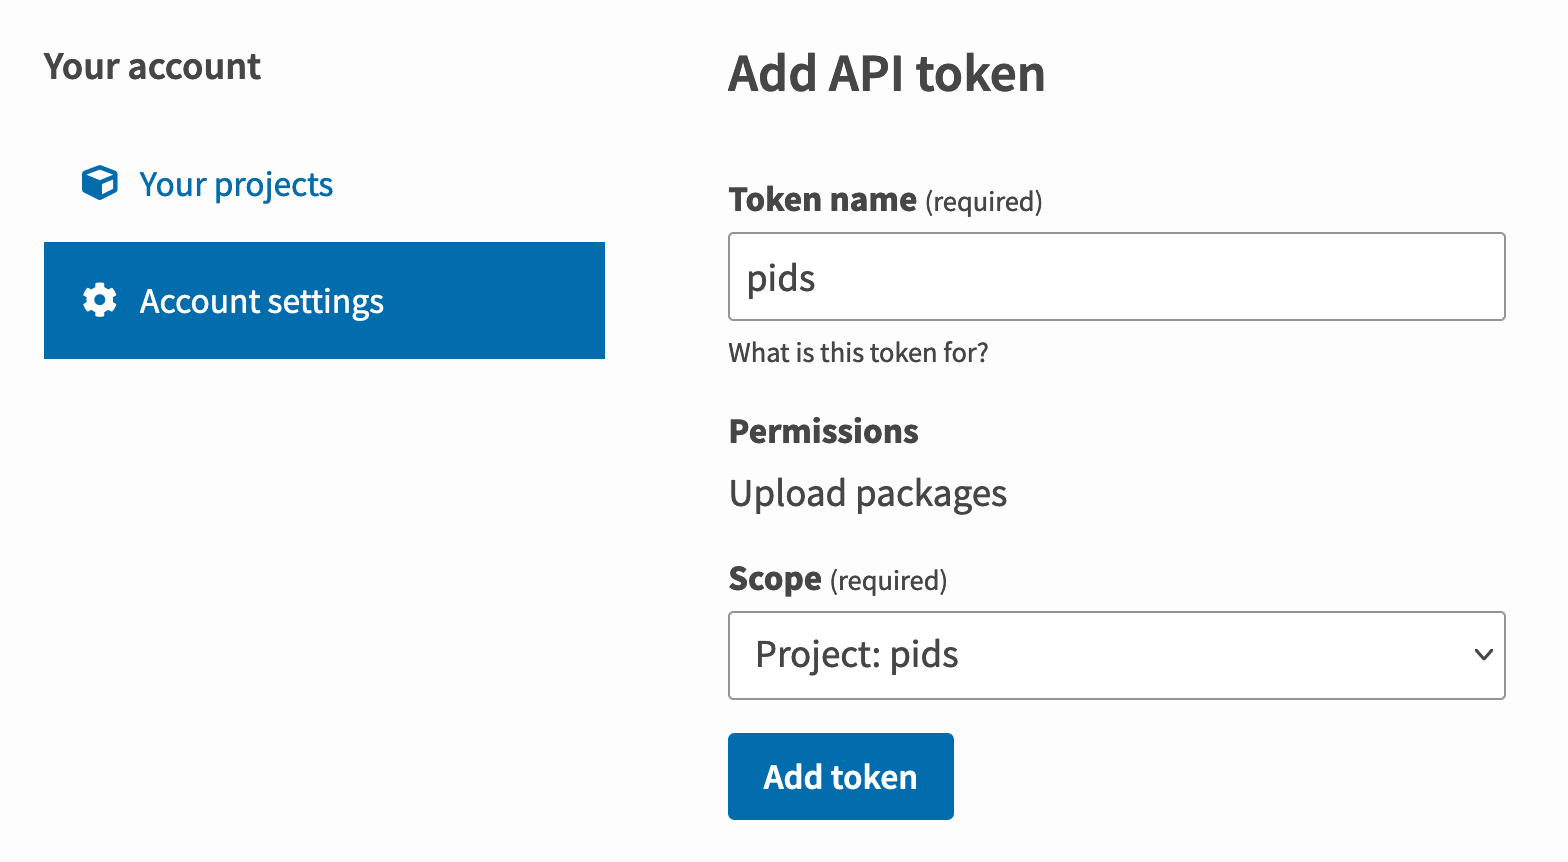
I copied out the newly created token:

Then I used the “Settings -> Secrets” tab on the GitHub repository to add that as a secret called PYPI_TOKEN:
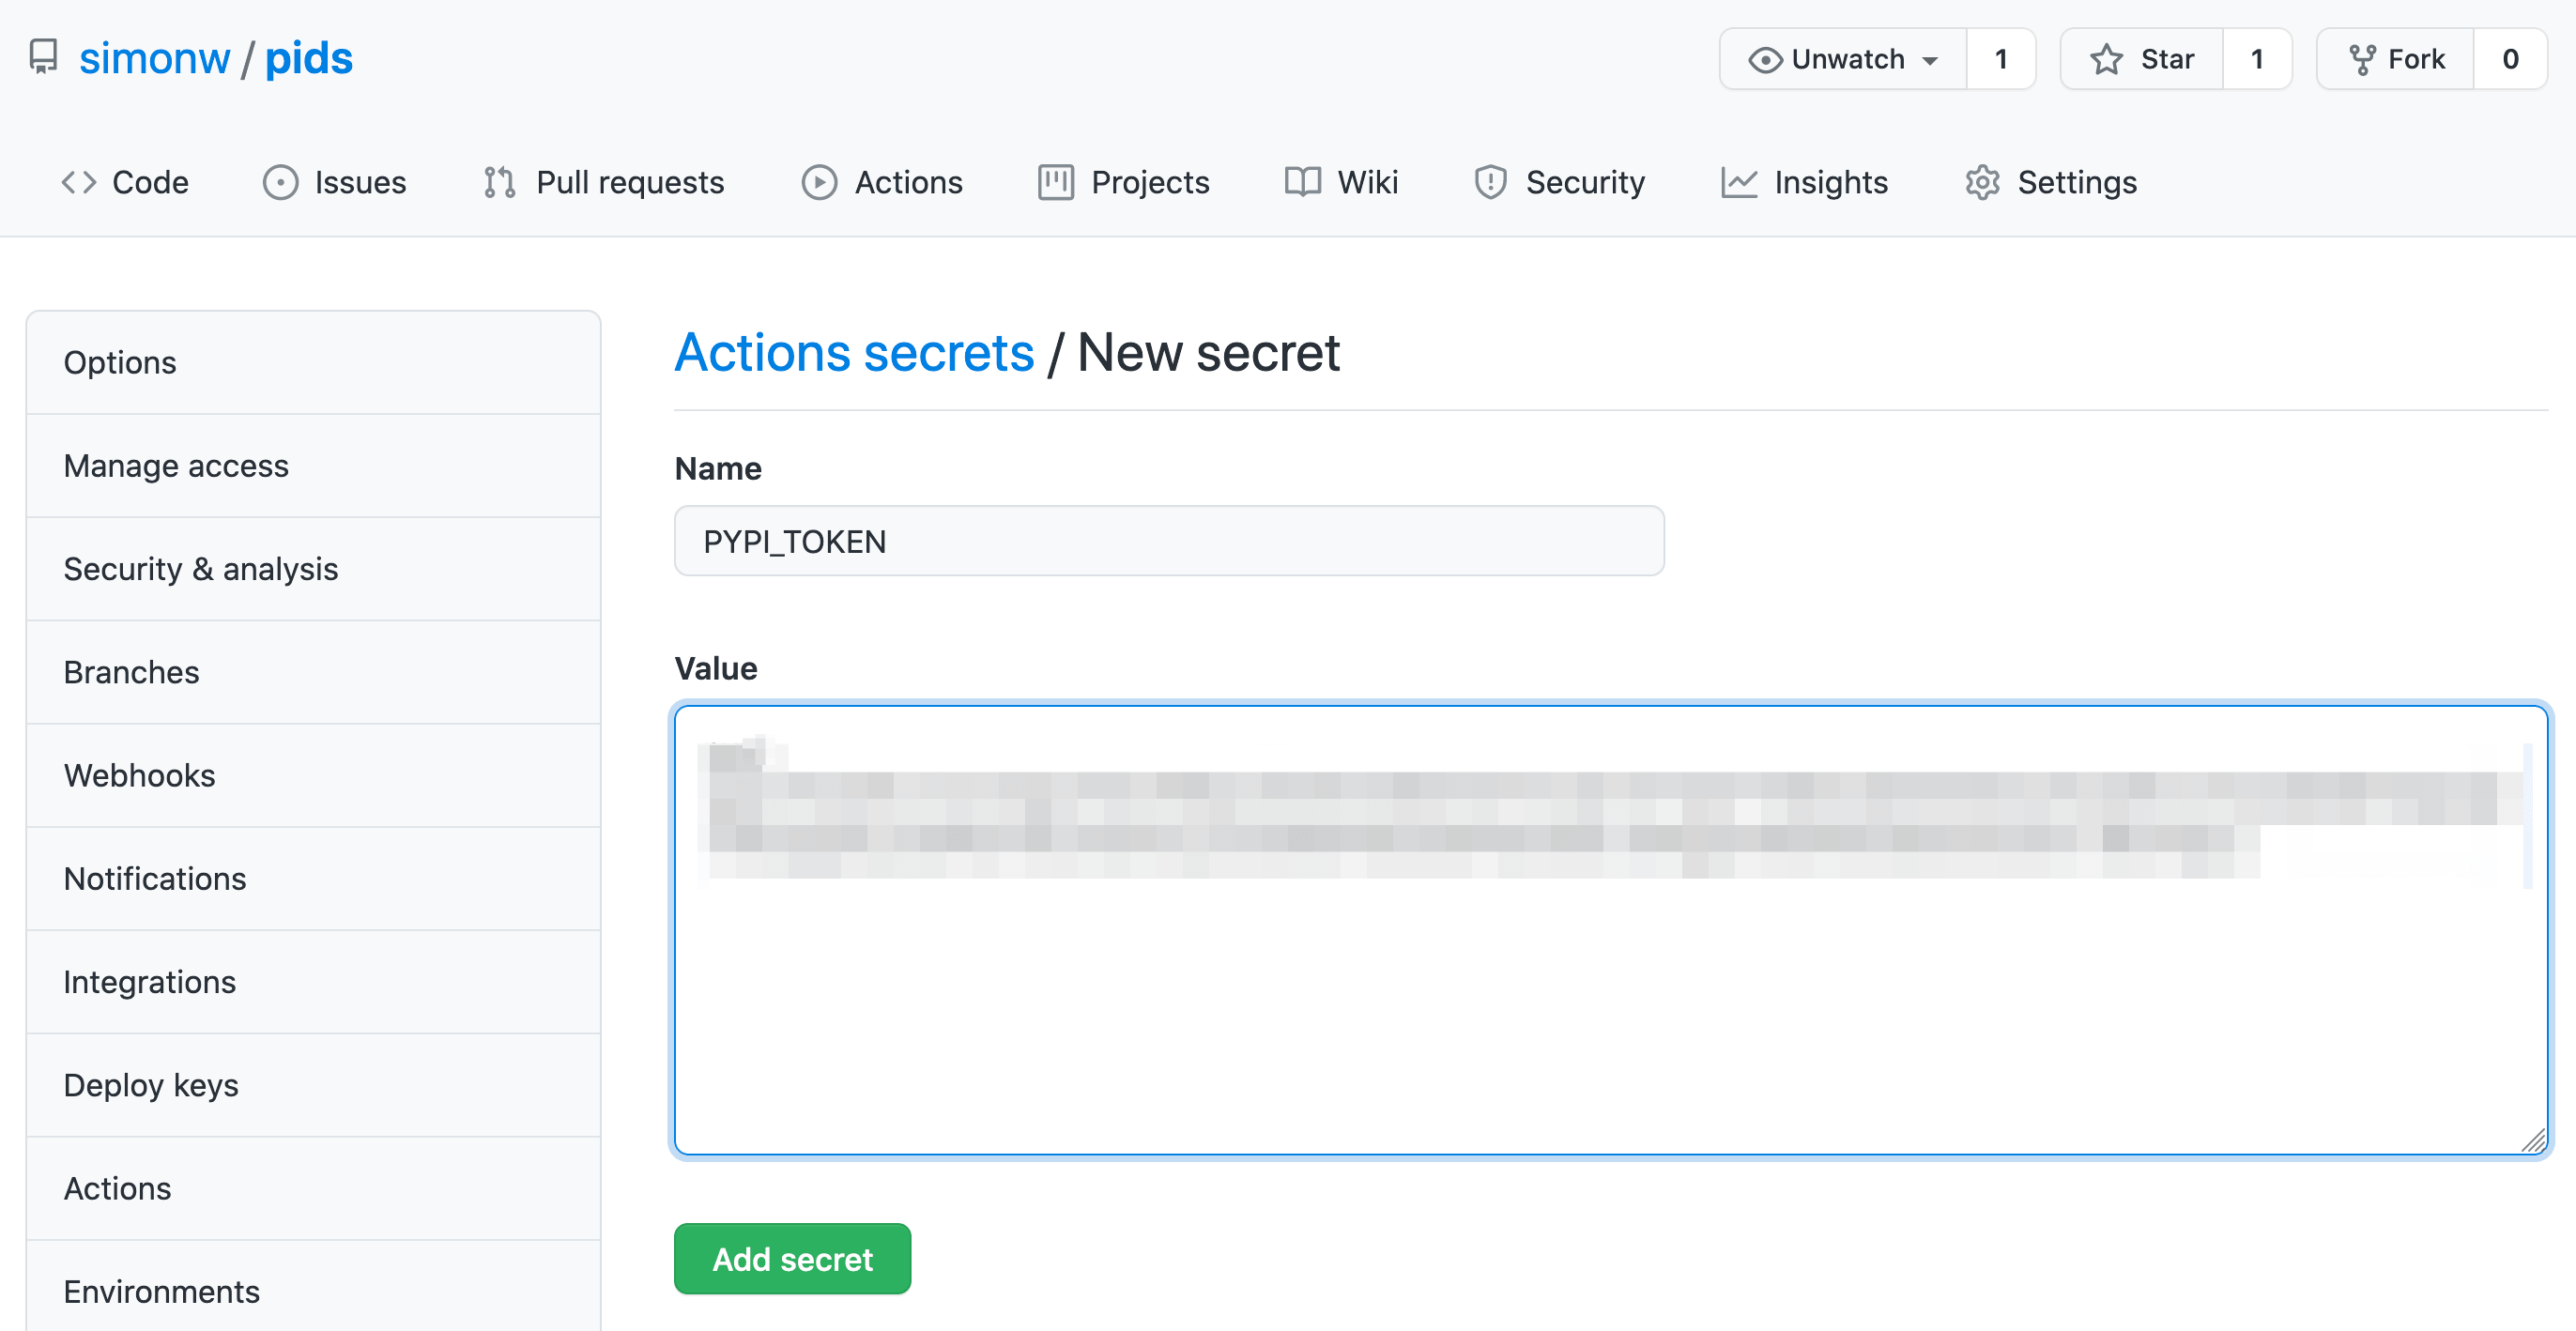
(I have since revoked the token that I used in the video, since it is visible on screen to anyone watching.)
I used the GitHub web interface to edit setup.py to bump the version number in that file up to 0.1.2, then I navigated to the releases tab in the repository, clicked “Draft new release” and created a release that would create a new 0.1.2 tag as part of the release process.
When I published the release, the publish.yml action started to run. After the tests had passed it pushed the new release to PyPI: https://pypi.org/project/pids/0.1.2/
Bonus: cookiecutter templates
I’ve published a lot of packages using this process—143 and counting!
Rather than copy and paste in a setup.py each time, a couple of years ago I switched over to using cookiecutter templates.
I have three templates that I use today:
- python-lib for standalone Python libraries
- datasette-plugin for Datasette plugins
- click-app for CLI applications built using the Click package
Back in August I figured out a way to make these available as GitHub repository templates, which I described in Dynamic content for GitHub repository templates using cookiecutter and GitHub Actions. This means you can create a new GitHub repository that implements the test.yml and publish.yml pattern described in this talk with just a few clicks on the GitHub website.
More recent articles
- Phoenix.new is Fly's entry into the prompt-driven app development space - 23rd June 2025
- Trying out the new Gemini 2.5 model family - 17th June 2025
- The lethal trifecta for AI agents: private data, untrusted content, and external communication - 16th June 2025